There’s a certain magic that happens when fresh pasta hits your plate—a texture, a flavor, an undeniable vibrancy that store-bought varieties just can’t match. For many home cooks, the idea of making pasta from scratch feels like a culinary Everest. But what if we told you it’s a journey made incredibly accessible and enjoyable, especially with a trusty KitchenAid pasta maker attachment? This ingenious accessory transforms your powerful stand mixer into a dedicated pasta-making maestro, turning intimidation into pure kitchen delight.
|
Our Picks for the Best Pasta Maker in 2026
As an Amazon Associate I earn from qualifying purchases.
|
||
| Num | Product | Action |
|---|---|---|
| 1 | Nuvantee Pasta Maker with 7 Adjustable Thickness Settings - 2 in 1 Noodle Maker with Rollers and Cutter, Make Spaghetti, Fettuccini, Lasagna, & More |

|
| 2 | Sailnovo Pasta Maker Machine, 180 Roller Pasta Maker, 9 Adjustable Thickness Settings 2-in-1 Noodles Maker with Rollers and Cutter, Perfect for Spaghetti, Fettuccini, Lasagna or Dumpling Skin Red |
|
| 3 | Antree Pasta Maker Attachment 3 in 1 Set for KitchenAid Stand Mixers Included Pasta Sheet Roller, Spaghetti Cutter, Fettuccine Cutter Maker Accessories and Cleaning Brush |
|
| 4 | NEWTRY Commercial Pasta Maker Machine Electric Dough Roller Noodle Making Machine with 2/6mm and 2.5mm Round Blade Thickness Adjustable for Fettuccine Pasta 110V |
|
| 5 | MARCATO Made in Italy Atlas 150 Classic Manual Pasta Maker Machine, Chrome Steel with Black Hand Crank. Makes Lasagna, Fettuccine & Tagliolini. |
|
| 6 | Pasta Maker Attachment for KitchenAid Stand Mixer, Pasta Maker Accessories Set Included Pasta Roller, Fettuccine Cutter, Spaghetti Cutter and Cleaning Brush, Homemade Fresh Noodles and Italian Cuisine |
|
| 7 | Electric Pasta Machine, Household Handheld Wireless Noodle Machine. A Homemade Noodle Machine With 10 Types Of Noodle Molds And 2 Types Of Enema Filling Nozzles |
|
| 8 | Imperia Pasta Maker Machine- 100% Made in Italy, Heavy Duty Steel Construction, Easy Lock Dial, Wood Grip Handle & Cleaning Brush- Fresh Homemade Italian Spaghetti Fettuccine or Lasagna (Classic Line) |
|
| 9 | Sailnovo Pasta Maker Machine, 180 Roller Pasta Maker, 9 Adjustable Thickness Settings 2-in-1 Noodles Maker with Rollers and Cutter, Perfect for Spaghetti, Fettuccini, Lasagna or Dumpling Skin Silver |
|
| 10 | ISILER Pasta Maker, 9 Adjustable Thickness Settings 2 in 1 Pasta Machine with Rollers and Cutter, Noodle Maker for Dumpling Skin, Spaghetti, Fettuccini, Lasagna |
|
The Allure of Fresh Pasta: Why Bother?
Forget what you think you know about pasta making. While the romantic image of Nonna hand-kneading dough for hours is charming, today’s kitchen heroes seek efficiency without sacrificing authenticity. Homemade pasta offers a superior taste, a delightful chew, and an unparalleled freshness that elevates any dish from ordinary to extraordinary. It’s a creative outlet, a satisfying endeavor, and a delicious way to connect with the culinary traditions of Italy, right in your own home.
Understanding Your Options: Types of KitchenAid Pasta Maker Attachments
KitchenAid offers a fantastic range of attachments, each designed to help you create specific pasta shapes with ease. Thinking about a KitchenAid pasta maker attachment means choosing the right tool for your pasta dreams.
The Classic Roller: Your Foundation for Flat Pasta
The pasta roller attachment is arguably the most fundamental piece in your fresh pasta arsenal. It securely fits into the power hub of your KitchenAid stand mixer and features adjustable settings to roll out sheets of dough to your desired thickness. This is where the magic of “hands-free” operation truly shines, allowing you to guide the dough with both hands as your mixer does the heavy lifting.
- Ideal for: Lasagna sheets, ravioli, tortellini, and hand-cut pasta.
- Key Feature: Multiple thickness settings (often seven or eight) for ultimate versatility.
The Essential Cutters: Shaping Your Strands
Once you’ve mastered the pasta sheets with the roller, KitchenAid’s cutter attachments come into play. These attachments are designed to seamlessly slice your freshly rolled dough into classic noodle shapes.
- Spaghetti Cutter: For thin, round strands, perfect for classic marinara or carbonara.
- Fettuccine Cutter: Creates wider, flat noodles, ideal for hearty Alfredo or rich meat sauces.
- Lasagnette Cutter: A mini version of lasagna noodles, thicker and wider than fettuccine, great for specific soups or layered dishes.
- Capellini Cutter: For very thin, angel hair-style pasta, best paired with light, delicate sauces.
The Versatile Extruder (Pasta Press): Crafting Unique Shapes
For those who crave more unique and robust pasta shapes, the KitchenAid Pasta Press attachment is a game-changer. This attachment uses the mixer’s power to push dough through various dies, creating hollow and spiral shapes that are notoriously difficult to make by hand.
- Ideal for: Bucatini (thick, hollow spaghetti), Rigatoni (large, ridged tubes), Fusilli (corkscrews), and Macaroni (small, curved tubes).
- Unique Experience: Many users find the extrusion process incredibly fun and satisfying, almost like witnessing a “minor miracle” as the pasta emerges.
Unlocking Culinary Creativity: Benefits of the KitchenAid Pasta Maker Attachment
Why invest in a KitchenAid pasta maker attachment? The benefits extend far beyond just making noodles.
Effortless Efficiency
One of the greatest advantages is the sheer ease it brings. Unlike manual pasta makers that require constant cranking with one hand while you guide the dough with the other, the KitchenAid attachments free up both your hands. This allows for better control and a smoother, more consistent result, turning what could be a laborious task into a breezy culinary adventure.
Superior Taste and Texture
Fresh pasta simply tastes better. It has a delicate, tender texture and a richer flavor that can’t be replicated by dried, boxed versions. Using your KitchenAid attachment ensures you’re always enjoying pasta at its peak freshness, enhancing any meal.
Unleash Your Inner Chef
With the ability to create various shapes and experiment with different flours (like semolina or durum wheat), you’re not just making pasta; you’re exploring a world of culinary possibilities. It’s a fantastic way to impress guests, engage children in the kitchen, and truly make a dish your own.
Durability and Craftsmanship
Many KitchenAid pasta attachments, particularly the roller and cutter sets, are crafted from durable, heavy-duty stainless steel and are often “Made in Italy,” reflecting a commitment to quality and longevity. This means your investment is built to last, providing years of delicious pasta-making.
Your First Batch: A Step-by-Step Guide to Using Your KitchenAid Pasta Attachment
Ready to dive in? Here’s a basic roadmap to using your KitchenAid pasta maker attachment.
Crafting the Perfect Dough
The foundation of great pasta is great dough. A simple recipe often includes all-purpose flour (or a mix with semolina), eggs, a touch of olive oil, and a pinch of salt. Mix these ingredients until a shaggy dough forms, then knead until smooth and elastic. Crucially, let your dough rest for at least 30 minutes. This allows the gluten to relax, making it easier to roll.
Attaching Your Gear
Before you begin, ensure your KitchenAid stand mixer is securely on a stable countertop. To attach your pasta maker, simply remove the hub cover from the front of your mixer, insert the attachment shaft into the power hub, and tighten the knob. It’s a quick and straightforward process.
Rolling the Sheets
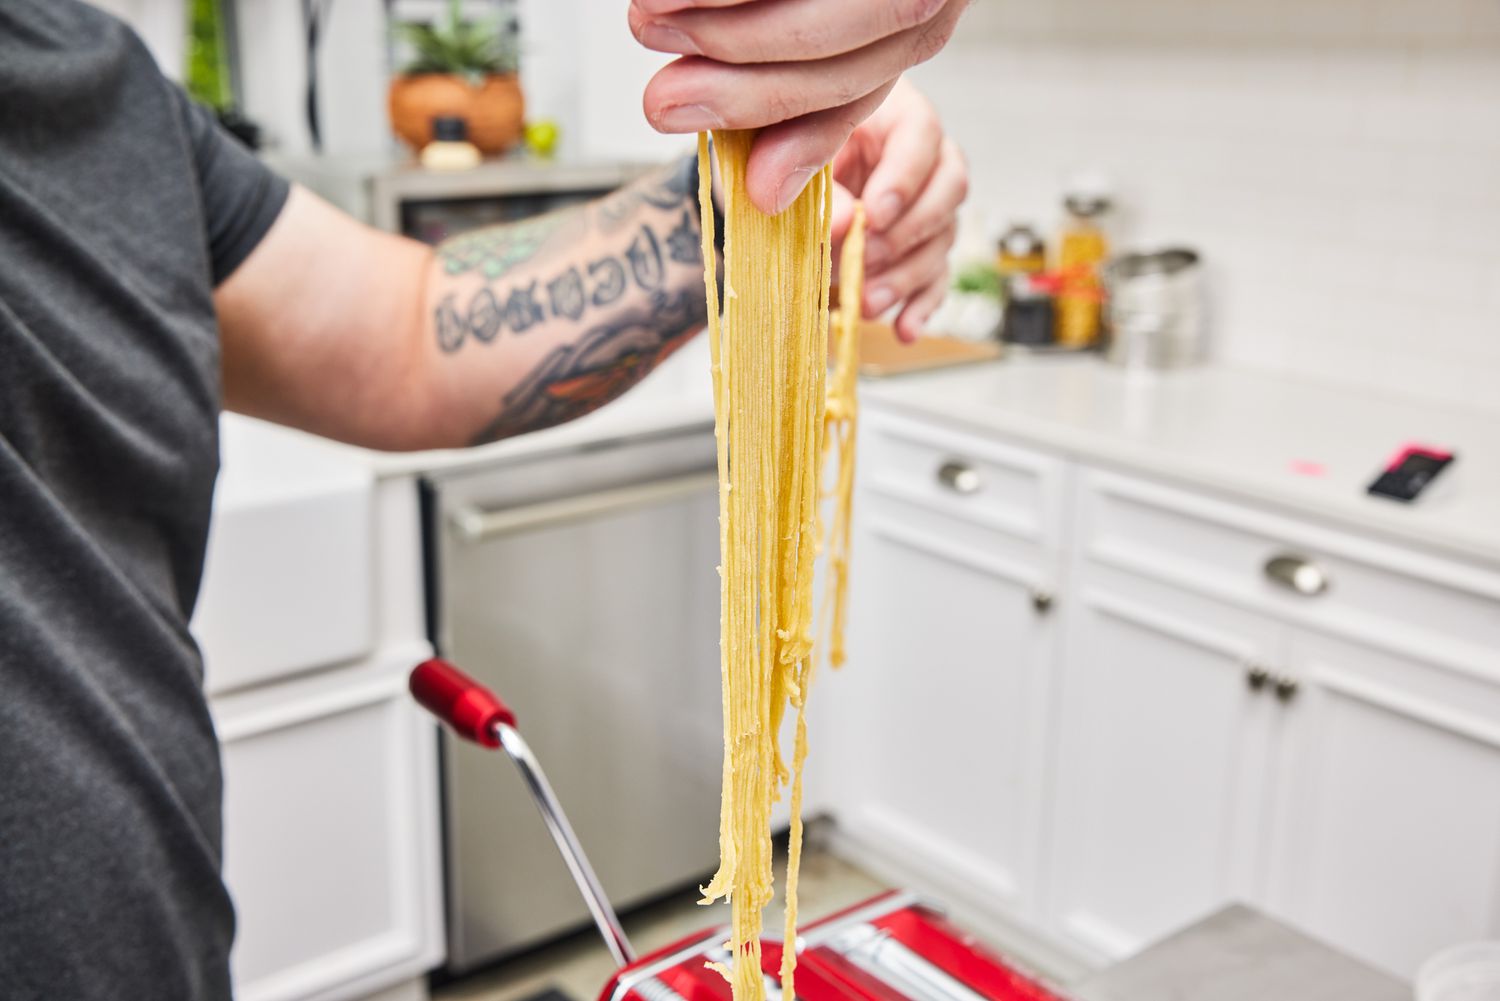
For the roller attachment, start on the widest setting (usually ‘1’). Flatten a portion of your dough slightly by hand, then feed it through the roller. Fold the dough in half and repeat this process several times, dusting lightly with flour if sticky. This helps to further knead the dough and make it smooth. Gradually increase the thickness setting, running the dough through each setting once or twice until you reach your desired thinness. Settings 4 or 5 are often ideal for lasagna, while higher numbers create thinner pasta.
Cutting Your Creation
Once your sheets are perfectly rolled, it’s time to cut! If using the cutter attachments, simply swap out the roller for your chosen cutter (spaghetti, fettuccine, etc.) and feed your pasta sheets through. For the pasta press (extruder), feed walnut-sized chunks of dough into the hopper, and watch as your desired shapes emerge. Use the integrated wire cutter to snip the pasta at your preferred length. Always dust your cut pasta with a bit of flour to prevent sticking.
Cooking Fresh Pasta
Fresh pasta cooks incredibly quickly—often in just 2-4 minutes, depending on thickness. Bring a large pot of salted water to a rolling boil, add your fresh pasta, and stir frequently to prevent sticking. Taste for al dente, drain, and serve immediately with your favorite sauce.
Keeping It Pristine: Care and Cleaning for Your KitchenAid Pasta Attachments
Proper care ensures your KitchenAid pasta maker attachment lasts for years.
The Golden Rule: No Water!
This is paramount. Never immerse your pasta attachments in water or put them in the dishwasher. Water can gum up the internal mechanisms and lead to rust.
Brushing and Tapping
The best way to clean your attachments is to let any dough residue dry completely for at least an hour. Once dry, the dough will flake away easily. Use the included cleaning brush or a stiff pastry brush to remove flour and dried pasta bits. For the pasta press, a toothpick or skewer can be very effective for dislodging dough from the dies and auger.
Storage Tips
Store your attachments in their original box or a protective case to keep them dust-free and prevent damage.
Beyond Spaghetti: A World of Pasta Shapes You Can Create
The versatility of your KitchenAid pasta maker attachment means a vast culinary canvas awaits.
- With the Roller & Cutters: Lasagna, ravioli, tortellini, fettuccine, spaghetti, capellini, tagliatelle (if hand-cut from sheets).
- With the Pasta Press: Bucatini, rigatoni, fusilli, large macaroni, small macaroni.
This range allows you to explore regional Italian specialties and even invent your own unique pasta forms.
Pairing Perfection: Sauce Ideas to Elevate Your Homemade Pasta
The beauty of fresh pasta is how it harmonizes with sauces.
- Light Sauces: For delicate capellini or thin spaghetti, think simple butter and Parmesan, a vibrant pesto, or a light garlic and olive oil sauce.
- Hearty Sauces: Thicker fettuccine or rigatoni stand up beautifully to rich ragùs, creamy Alfredo, or a robust marinara with meatballs. The ridges of rigatoni are perfect for clinging to chunky sauces. Hollow bucatini also excels at capturing sauces within its tubes.
Expert Insight: A Chef’s Take on KitchenAid Pasta Attachments
“In my kitchen, efficiency and quality are non-negotiable. The KitchenAid pasta maker attachment strikes that perfect balance,” says Chef Isabella Rossi, a renowned Italian culinary instructor. “It democratizes fresh pasta, making it achievable for anyone, regardless of their experience. The consistent sheets and perfectly formed shapes elevate every dish, proving that traditional flavors can indeed thrive with modern convenience.”
FAQs: Your Top Questions Answered
Are KitchenAid pasta attachments worth the investment?
Many users emphatically say yes! They are praised for their quality, durability, and how they simplify fresh pasta making, allowing you to enjoy superior taste and texture compared to store-bought options.
Can I make gluten-free pasta with these attachments?
Yes, you can. You’ll need to use a well-formulated gluten-free pasta dough recipe, as the texture can be different from traditional wheat-based dough. The attachments themselves are compatible with various dough types.
What’s the difference between the roller and the pasta press?
The pasta roller creates flat sheets of pasta dough of varying thicknesses, which you then cut into shapes like lasagna or spaghetti with separate cutters. The pasta press (extruder) directly forms dough into specific shapes like bucatini, rigatoni, or fusilli by pushing it through dies.
How long does fresh pasta last?
Fresh pasta can be cooked immediately, or you can dry it for several hours to a day and store it in an airtight container for up to a few weeks. It can also be frozen for longer storage (up to several months).
Are the attachments difficult to assemble?
No, most users find them intuitive to assemble. They easily connect to the power hub of your KitchenAid stand mixer.
Can I wash my pasta attachments in the dishwasher?
Absolutely not. Never wash your KitchenAid pasta attachments with water or in a dishwasher. Let any dough dry and then brush it off.
What are the best thickness settings for different pasta types?
The instruction manual that comes with your attachments will provide specific guidance, but generally, settings 1-3 are for initial kneading and thicker sheets, while settings 4-5 are good for lasagna and hearty noodles, and settings 6-8 create progressively thinner pasta like capellini.
A World of Pasta Awaits
Embracing the KitchenAid pasta maker attachment is more than just buying a kitchen gadget; it’s an invitation to a richer, more flavorful culinary journey. From the satisfying process of watching dough transform into delicate sheets to the unparalleled taste of a fresh, homemade meal, this attachment empowers you to bring the authentic flavors of Italy right to your dining table. So go ahead, experiment, create, and savor the magic of truly fresh pasta. Your taste buds will thank you.