There’s a special kind of magic that happens when you create something from scratch, especially when it comes to food. And in the world of Italian cuisine, few things rival the simple pleasure and profound satisfaction of fresh, homemade pasta. It’s a taste, a texture, and an experience that store-bought varieties simply can’t replicate. That’s where the Homemade Pasta Maker steps in, transforming a potentially daunting task into an enjoyable culinary adventure.
Imagine silken strands of fettuccine or perfectly formed ravioli, crafted by your own hands, ready to be tossed with your favorite sauce. A high-quality homemade pasta maker isn’t just a kitchen gadget; it’s a gateway to authentic flavors, healthier meals, and a deeply rewarding cooking process.
The Enduring Allure: A Brief History of Pasta Making
The art of pasta making stretches back centuries, deeply woven into the fabric of Italian culture. Before the advent of modern machinery, pasta was a labor of love, kneaded by hand and rolled with long wooden pins by skilled home cooks (or “nonnas” as they’re affectionately known). This tradition, passed down through generations, emphasized fresh ingredients and meticulous technique. While the core ingredients remain simple—flour, eggs, and sometimes water—the process has evolved to become more accessible. The manual pasta maker, a tabletop device with rollers and a hand crank, revolutionized home pasta production in the late 19th and early 20th centuries, bringing the joy of fresh pasta to countless kitchens. Today, a new wave of electric and attachment-based pasta makers continues this legacy, making it easier than ever to enjoy homemade goodness.
Your Culinary Companion: Understanding Different Types of Homemade Pasta Makers
Choosing the right homemade pasta maker depends on your cooking style, kitchen space, and desired level of involvement. Each type offers a unique experience:
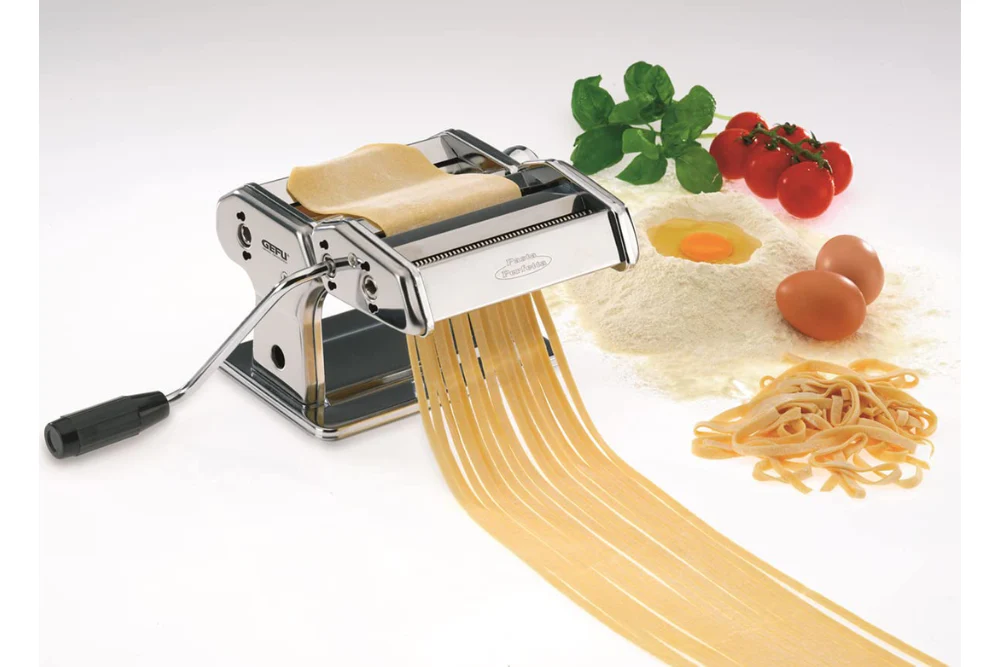
Manual Pasta Makers
These are the traditional workhorses, often made of stainless steel with a hand crank and adjustable rollers. You feed the dough through progressively thinner settings, then use cutting attachments for various shapes.
- Pros: Affordable, durable, excellent for developing a feel for the dough, classic aesthetic. Many users praise models like the Marcato Atlas 150 for its robust construction and smooth operation.
- Cons: Requires manual effort (especially for kneading initially), can be slower for large batches.
Electric Pasta Makers
Designed for convenience, electric models automate much of the process. Some roll and cut, similar to manual ones but with a motor, while others are extruders.
- Pros: Less strenuous, faster, ideal for larger quantities or for those seeking minimal effort. Extruder models can create a wider variety of shapes (like penne, rigatoni) that rollers cannot.
- Cons: Can be more expensive, some extruder models work best with specific dough recipes provided by the manufacturer.
Stand Mixer Attachments
If you already own a powerful stand mixer (like a KitchenAid), attachments can transform it into a highly efficient homemade pasta maker.
- Pros: Saves counter space, utilizes existing motor power, typically offers consistent rolling and cutting.
- Cons: Requires a stand mixer, specific attachments can be an additional investment.
“Choosing a pasta maker is a personal journey,” says Chef Valentina Rossi, a renowned expert in Italian culinary traditions. “Whether you prefer the hands-on feel of a manual machine or the swift efficiency of an electric model, the goal is always the same: to create delicious pasta that connects you to the heart of Italian cooking.”
The Rewards Await: Benefits of Owning a Homemade Pasta Maker
Why invest in a homemade pasta maker? The advantages extend far beyond just dinner:
- Unmatched Freshness and Flavor: Fresh pasta has a delicate texture and vibrant flavor that dried, store-bought pasta simply can’t match. It absorbs sauces more effectively, making every bite a delight.
- Ingredient Control and Healthier Eating: You dictate exactly what goes into your pasta, allowing you to choose high-quality flours (like “00” or semolina), organic eggs, and avoid preservatives and additives found in packaged options. This is especially beneficial for dietary needs, such as using whole-grain or gluten-free flours.
- Versatility in Shapes and Flavors: Many pasta makers come with attachments or offer additional dies to create a vast array of pasta shapes, from classic spaghetti and fettuccine to more elaborate ravioli and tortellini. You can also infuse your dough with flavors like spinach, beet, or squid ink for colorful, gourmet creations.
- Cost-Effectiveness: While there’s an initial investment, making pasta from scratch is often cheaper than regularly buying premium fresh pasta from specialty stores.
- A Fun and Rewarding Experience: The process of making pasta is inherently satisfying. It can be a relaxing solo activity or a wonderful way to involve family and friends in the kitchen, creating cherished memories alongside delicious food.
- Consistent Results: Machines help achieve uniform thickness and shape, ensuring even cooking and professional-looking results every time, which can be challenging to do by hand.
Getting Started: How to Use Your Homemade Pasta Maker
Making fresh pasta with a homemade pasta maker is simpler than you might think. Here’s a basic guide, typically applicable to most roller-style machines:
Basic Egg Pasta Dough Recipe
- 200g “00” flour (or all-purpose flour)
- 2 large eggs
- Pinch of salt (optional, some prefer to add only to boiling water)
Step-by-Step Guide
- Prepare the Dough: On a clean surface, pile the flour and create a well in the center. Crack the eggs into the well and add salt. Using a fork, gently whisk the eggs, gradually incorporating flour from the edges until a shaggy dough forms. Knead by hand for 8-10 minutes until the dough is smooth and elastic. If it’s too dry, add a tiny bit of water; if too sticky, a little more flour.
- Rest the Dough: Form the dough into a ball, wrap it tightly in plastic wrap, and let it rest at room temperature for at least 30 minutes. This allows the gluten to relax, making the dough easier to roll.
- Set Up Your Machine: Secure your homemade pasta maker to a sturdy counter or table using its clamp. Attach the hand crank if it’s a manual model.
- Initial Rolling (Thickest Setting): Divide the dough into 3-4 pieces and flatten one piece by hand into an oval or rectangle, no wider than your machine’s rollers. Set the machine to its thickest setting (usually ‘1’). Feed the dough through the rollers while turning the crank steadily.
- Fold and Repeat: After the first pass, fold the dough into thirds (like a letter) and feed it through the thickest setting again. Repeat this folding and rolling 3-4 times. This helps to further knead and smooth the dough, ensuring even thickness. Lightly dust the dough and rollers with flour as needed to prevent sticking.
- Progressive Thinning: Gradually decrease the thickness setting on your homemade pasta maker by one notch at a time. Feed the dough through each setting once or twice. Continue until you reach your desired pasta thickness (often setting 4 or 5 for most machines). The dough should be smooth and slightly translucent.
- Cut the Pasta: Attach the desired cutting attachment (e.g., fettuccine or spaghetti). Lightly flour the pasta sheet and feed it through the cutter, turning the crank at a steady pace. Gently separate the noodles and dust them lightly with flour to prevent sticking.
- Cook or Store: Fresh pasta cooks quickly! Boil in generously salted water for 1-3 minutes, depending on thickness. You can also coil the pasta into nests, dust with flour, and dry on a rack for a few hours, or store in an airtight container in the refrigerator for up to 3 days, or freeze for longer storage.
Nurturing Your Noodle Machine: Care and Cleaning Tips
Proper care ensures your homemade pasta maker remains a reliable kitchen companion for years.
- Never Immerse in Water: This is crucial! Most pasta makers, especially manual ones, are not designed to be submerged in water or put in a dishwasher, as it can cause rust and damage.
- Clean Immediately After Use: The easiest time to clean is when dough residue is still soft. Use a dry cloth or a soft brush (like an old toothbrush or pastry brush) to remove flour and dough bits from the rollers and cutters.
- Remove Stubborn Bits: For dried or stuck-on dough, use a wooden skewer or toothpick to gently pry it out. Some attachments have plastic combs that can be removed for easier cleaning.
- Wipe Down Exterior: Use a barely damp cloth to wipe the exterior of the machine, then dry thoroughly.
- Allow to Air Dry: Ensure all parts are completely dry before reassembling and storing to prevent rust or mold.
- Lubrication (Optional): If your machine starts to squeak, a few drops of food-grade mineral oil on the roller shafts can help maintain smooth operation.
- Storage: Store your pasta maker in a cool, dry place, ideally in its original box or a protective cover, to prevent dust and moisture damage.
Beyond Spaghetti: Italian Pasta Shapes You Can Create
A homemade pasta maker unlocks a world of traditional Italian pasta shapes, each with its own charm and ideal sauce pairing:
- Fettuccine: Flat, wide ribbons, perfect for rich, creamy sauces like Alfredo or a hearty ragu.
- Tagliatelle: Similar to fettuccine but slightly narrower, traditionally served with Bolognese.
- Lasagne Sheets: Wide, thin sheets for layering in baked dishes.
- Ravioli/Tortellini: Stuffed pastas that use thin sheets of dough, often filled with cheese, meat, or vegetables. You’ll typically need an additional attachment or mold for these.
- Pappardelle: Very wide, flat ribbons, excellent with robust meat sauces or mushroom ragu.
- Spaghetti: Long, thin, round strands, a universal favorite for tomato or olive oil-based sauces.
For those adventurous cooks, extruder-style pasta makers can produce tubular shapes like penne and rigatoni, expanding your repertoire even further.
The Perfect Pairings: Easy Homemade Sauce Recipes
What’s fresh pasta without a delicious sauce? Here are a couple of classic, easy-to-make sauces that pair beautifully with your homemade creations:
1. Simple Marinara Sauce
A vibrant, fresh tomato sauce that highlights the pasta.
- Ingredients: 2 tbsp olive oil, 1/2 medium onion (finely diced), 3 cloves garlic (minced), 28 oz can crushed tomatoes, 1/2 tsp dried oregano, 1/2 tsp salt, 1/4 tsp black pepper, 1 tbsp fresh basil (chopped).
- Method: Heat olive oil in a saucepan. Sauté onion until soft (about 5 minutes), then add garlic and cook for another minute until fragrant. Stir in crushed tomatoes, oregano, salt, and pepper. Bring to a light boil, then reduce heat and simmer partially covered for 15 minutes. Stir in fresh basil just before serving.
2. Aglio e Olio (Garlic and Oil)
A timeless, minimalist sauce that lets the pasta truly shine.
- Ingredients: 1/2 cup extra virgin olive oil, 4-6 cloves garlic (thinly sliced), 1/2 tsp red pepper flakes (optional), 1/4 cup fresh parsley (chopped), salt to taste.
- Method: In a skillet, gently heat the olive oil over low heat. Add the sliced garlic and red pepper flakes (if using). Cook slowly, without browning the garlic, until it’s fragrant and slightly golden (about 5-7 minutes). Remove from heat. Toss with your freshly cooked pasta, a splash of pasta water, and fresh parsley. Season with salt.
Frequently Asked Questions About Homemade Pasta Makers
Q: Is a homemade pasta maker worth it?
A: Absolutely! A homemade pasta maker is a worthwhile investment for anyone who appreciates fresh, flavorful food, wants control over ingredients, and enjoys the therapeutic process of cooking from scratch. The superior taste and texture of fresh pasta are often cited as primary reasons.
Q: What kind of flour is best for homemade pasta?
A: Italian “00” flour is traditionally preferred for its fine texture, resulting in silky pasta. However, all-purpose flour works very well, yielding a slightly chewier result. Some recipes also incorporate semolina flour for sturdiness and a rustic texture, especially for extruded shapes.
Q: How long does homemade pasta cook?
A: Fresh pasta cooks significantly faster than dried pasta, typically taking only 1-4 minutes in boiling, salted water, depending on its thickness and shape. Always taste a strand to check for al dente perfection.
Q: Can I make gluten-free pasta with a homemade pasta maker?
A: Yes, many people successfully make gluten-free pasta with a homemade pasta maker using alternative flours. However, specific recipes and techniques designed for gluten-free dough are recommended as these doughs can behave differently.
Q: Is it hard to clean a homemade pasta maker?
A: Not if you clean it immediately after use! While pasta makers have nooks and crannies, dried dough is the biggest challenge. A dry brush and quick wipe-down after each session usually suffice, avoiding water at all costs for most models.
Embrace the Joy of Homemade Pasta
The journey of making pasta from scratch is a delicious one, full of discovery and satisfaction. With a homemade pasta maker, you’re not just preparing a meal; you’re engaging in a culinary tradition, infusing your food with care, creativity, and authentic flavor. So, roll up your sleeves, dust off that flour, and get ready to experience the unparalleled joy of pasta, perfectly crafted in your own kitchen. Your taste buds, and your family, will thank you.