There’s something truly magical about homemade pasta, a culinary experience that elevates a simple meal into an unforgettable feast. And when it comes to robust, sauce-gripping shapes, rigatoni stands proud. If you’ve ever dreamt of crafting those perfect, ridged tubes right in your own kitchen, then understanding the rigatoni pasta maker is your first step into a world of authentic Italian flavors. It’s more than just a kitchen gadget; it’s a gateway to fresh, flavorful pasta that store-bought simply can’t match.
|
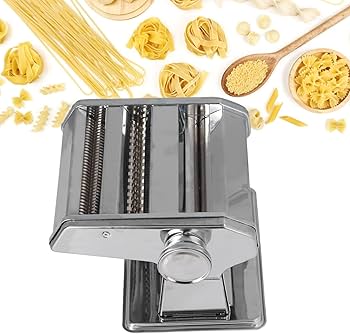
Our Picks for the Best Pasta Maker in 2026
As an Amazon Associate I earn from qualifying purchases.
|
||
| Num | Product | Action |
|---|---|---|
| 1 | Sailnovo Pasta Maker Machine, 180 Roller Pasta Maker, 9 Adjustable Thickness Settings 2-in-1 Noodles Maker with Rollers and Cutter, Perfect for Spaghetti, Fettuccini, Lasagna or Dumpling Skin Red |

|
| 2 | Antree Pasta Maker Attachment 3 in 1 Set for KitchenAid Stand Mixers Included Pasta Sheet Roller, Spaghetti Cutter, Fettuccine Cutter Maker Accessories and Cleaning Brush |
|
| 3 | ISILER Pasta Maker, 9 Adjustable Thickness Settings 2 in 1 Pasta Machine with Rollers and Cutter, Noodle Maker for Dumpling Skin, Spaghetti, Fettuccini, Lasagna |
|
| 4 | Imperia Pasta Maker Machine- 100% Made in Italy, Heavy Duty Steel Construction, Easy Lock Dial, Wood Grip Handle & Cleaning Brush- Fresh Homemade Italian Spaghetti Fettuccine or Lasagna (Classic Line) |
|
| 5 | NEWTRY Commercial Pasta Maker Machine Electric Dough Roller Noodle Making Machine with 2/6mm and 2.5mm Round Blade Thickness Adjustable for Fettuccine Pasta 110V |
|
| 6 | Pasta Maker Attachment for KitchenAid Stand Mixer, Pasta Maker Accessories Set Included Pasta Roller, Fettuccine Cutter, Spaghetti Cutter and Cleaning Brush, Homemade Fresh Noodles and Italian Cuisine |
|
| 7 | MARCATO Made in Italy Atlas 150 Classic Manual Pasta Maker Machine, Chrome Steel with Black Hand Crank. Makes Lasagna, Fettuccine & Tagliolini. |
|
| 8 | Sailnovo Pasta Maker Machine, 180 Roller Pasta Maker, 9 Adjustable Thickness Settings 2-in-1 Noodles Maker with Rollers and Cutter, Perfect for Spaghetti, Fettuccini, Lasagna or Dumpling Skin Silver |
|
| 9 | Electric Pasta Machine, Household Handheld Wireless Noodle Machine. A Homemade Noodle Machine With 10 Types Of Noodle Molds And 2 Types Of Enema Filling Nozzles |
|
| 10 | Nuvantee Pasta Maker with 7 Adjustable Thickness Settings - 2 in 1 Noodle Maker with Rollers and Cutter, Make Spaghetti, Fettuccini, Lasagna, & More |
|
The Ancient Roots of Pasta Making
Pasta’s journey from humble origins to a global culinary staple is a testament to human ingenuity. For centuries, the art of pasta making relied on skilled hands and simple tools. Early methods involved kneading dough and rolling it by hand, a labor of love that created delicate, flat sheets. As the desire for more diverse shapes grew, so did the tools. The invention of the pasta maker, in its various forms, revolutionized home cooking, allowing enthusiasts to recreate traditional Italian shapes with greater ease and consistency. While flat pasta like tagliatelle and fettuccine might be a common sight with hand-cranked roller machines, creating a distinct shape like rigatoni demands a specialized approach: extrusion.
Understanding Pasta Makers: Beyond the Roller
When we talk about pasta makers, it’s crucial to distinguish between the two primary mechanisms: rollers and extruders. This distinction is particularly vital for making rigatoni.
Roller Pasta Makers: These machines, often manual or attachment-based for stand mixers, work by progressively flattening dough into thin sheets. Think of them as giving your biceps a break from a rolling pin. They excel at making flat, sheet-like pastas like lasagna, fettuccine, and spaghetti (which is then cut from the sheets).
Extruder Pasta Makers: This is where the magic happens for shapes like rigatoni. An extruder works by forcing a denser, often lower-hydration dough through specially designed metal discs, called dies, that have the specific shape you desire. For rigatoni, the dough is pushed through a tubular die, forming those characteristic ridged tubes. Without an extruder, achieving the hollow, ridged structure of rigatoni is significantly more challenging, typically requiring intricate hand-shaping with a gnocchi board and a dowel after rolling out sheets.
“To truly master tubular pasta like rigatoni, an extruder is non-negotiable. It’s the engineering marvel that gives us those perfect, sauce-hugging grooves,” explains Chef Enzo Bianchi, a third-generation Italian pastai.
Types of Rigatoni Pasta Makers for Home Chefs
For home cooks aspiring to make fresh rigatoni, there are a few excellent options available, each offering a different level of automation and convenience.
Electric Pasta Extruders
These are the workhorses of homemade extruded pasta. Electric pasta makers are typically all-in-one units that handle everything from mixing the dough to extruding the pasta. You simply add your ingredients, select your desired die (including a rigatoni pasta maker die), and the machine kneads the dough and then pushes it through the die, yielding perfect pasta strands. Brands like Philips are well-regarded for their electric pasta and noodle makers, often coming with a variety of dies, including those for rigatoni.
- Benefits: Fully automatic, consistent results, wide variety of shapes with interchangeable dies, less manual effort.
- Considerations: Requires a specific, often drier dough consistency, can be pricier than manual rollers, and dies need proper cleaning.
Stand Mixer Extruder Attachments
If you already own a powerful stand mixer (like a KitchenAid), an extruder attachment can be a fantastic investment. These attachments harness the mixer’s motor to extrude pasta dough through various dies, including those for rigatoni. The KitchenAid Gourmet Pasta Press Attachment, for instance, is a popular choice that includes a rigatoni disc, allowing you to easily transform your mixer into a dedicated rigatoni pasta maker.
- Benefits: Utilizes existing kitchen equipment, space-saving if you already have a mixer, good variety of shapes.
- Considerations: Requires a stand mixer, often a separate purchase from roller attachments, dough consistency is still key.
Manual Methods for Shaping Rigatoni
While not strictly a “rigatoni pasta maker” in the automated sense, it’s possible to manually create rigatoni from rolled pasta sheets. This involves rolling dough to a specific thickness (often using a manual roller machine), cutting it into small squares, and then rolling each square around a wooden dowel on a ridged gnocchi board to form the tube and create the characteristic ridges. This method is labor-intensive but offers a deeply traditional, hands-on experience.
- Benefits: Authenticity, no specialized extruder machine needed (if you have a roller and gnocchi board), highly rewarding.
- Considerations: Very time-consuming, requires practice and skill to achieve consistent shapes, not ideal for large batches.
Why a Rigatoni Pasta Maker Belongs in Your Kitchen
Owning a rigatoni pasta maker transcends mere convenience; it’s an invitation to a richer culinary life.
Unmatched Freshness and Flavor
There’s simply no comparison between fresh, homemade pasta and its dried, store-bought counterpart. Fresh rigatoni has a tender, yet resilient bite, a delicate flavor that sings on its own, and a texture that truly elevates any sauce it accompanies.
Customization at Your Fingertips
Making your own pasta means you’re in control of every ingredient. Experiment with different flours (semolina, ’00’, whole wheat), add vibrant vegetable purées for color and nutrients, or infuse your dough with herbs and spices. This level of customization is impossible with pre-made options.
Perfect Texture for Sauce Adhesion
The beauty of rigatoni lies in its ridges and hollow interior, designed to capture and hold sauces like no other. Many extruder dies, especially traditional bronze dies, create a slightly rougher surface on the pasta, further enhancing its ability to cling to hearty ragùs and creamy concoctions. This isn’t just a detail; it’s fundamental to an authentic Italian pasta experience.
The Joy of Creation
Beyond the delicious results, there’s immense satisfaction in the process itself. Watching dough transform into beautiful rigatoni, knowing every ingredient that went into it, and sharing that creation with loved ones is a truly joyful and rewarding experience.
Crafting Your Rigatoni: A Step-by-Step Guide
Making fresh rigatoni with an extruder-style pasta maker is surprisingly straightforward once you get the hang of it.
1. Dough Preparation: The Foundation of Flavor
The key to successful extruded pasta is the right dough consistency. Unlike the soft, pliable dough for rolled pasta, extruded dough needs to be firmer and more crumbly, resembling coarse cornmeal or rice grains. This prevents it from getting stuck and ensures proper shaping.
- Ingredients: A common ratio for rigatoni dough includes a mix of ’00’ flour and durum wheat semolina flour, along with eggs and/or water. Semolina is crucial for texture and structure.
- Mixing: Combine flours in your pasta maker’s mixing chamber. Whisk eggs and a minimal amount of water (if using) separately, then gradually add to the flour. The machine will mix and knead the dough until it forms small, crumbly pellets. Resist the urge to add too much liquid; a slightly dry dough is better for extrusion.
- Resting: Once mixed, let the dough rest for about 20-30 minutes, covered, to allow the gluten to relax. This makes it easier to extrude.
2. Assembling and Operating Your Rigatoni Pasta Maker
- Attach the Die: Ensure your rigatoni pasta maker has the correct die installed. These dies are usually made of plastic or, for a superior texture, bronze.
- Feed the Dough: Once rested, feed small portions of your crumbly dough into the extrusion chamber.
- Extrusion: Turn on the machine (or your stand mixer if using an attachment). The dough will be pressed through the rigatoni die, emerging as long, ridged tubes.
- Cutting: As the rigatoni extrudes, use the integrated cutter (on electric models) or a sharp knife to cut the pasta into your desired lengths, typically about 1.5 to 2 inches. Allow the cut rigatoni to fall onto a lightly floured baking sheet.
3. Drying Techniques for Perfect Rigatoni
Fresh rigatoni can be cooked immediately, but a short drying period significantly improves its texture and helps it hold its shape during cooking.
- Air Drying: Arrange the cut rigatoni in a single layer on a semolina-dusted baking sheet or a wire rack. Let it air dry at room temperature for at least 1-2 hours. For a firmer, more traditional bite, you can dry it for several hours or even overnight. This slight drying prevents sticking and gives the pasta a better “tooth.”
- Storage: If not cooking immediately, you can store lightly dried fresh rigatoni in an airtight container in the refrigerator for 1-2 days, or freeze it for longer storage (up to a month).
Caring for Your Rigatoni Maker: Tips for Longevity
Proper maintenance ensures your rigatoni pasta maker remains a reliable companion for years of delicious meals.
- Cleaning Dies: Extruder dies, especially those with intricate shapes like rigatoni, can be tricky to clean. The best method is often counterintuitive: allow any leftover dough in the die to dry completely. Once dry, it usually becomes brittle and can be easily brushed or picked out. Alternatively, immediately after use, soak the dies in warm water to keep any stuck dough soft, then use a small brush to clean thoroughly. Avoid harsh scrubbing that could scratch bronze dies.
- General Cleaning: Wipe down the main unit with a damp cloth. For electric models, follow the manufacturer’s instructions for disassembling and cleaning removable parts.
- Storage: Store your pasta maker and dies in a clean, dry place to prevent rust or damage.
Beyond Rigatoni: Exploring Other Pasta Shapes
The beauty of an extruder-style pasta maker, especially one equipped with multiple dies, is its versatility. While you’ve mastered the art of rigatoni, your machine can likely create an array of other beloved shapes, such as penne, fusilli, macaroni, bucatini, and even spaghetti. Each shape offers a unique culinary canvas, inviting different sauces and preparations.
The Perfect Pair: Sauces for Your Homemade Rigatoni
Homemade rigatoni, with its robust shape and satisfying chew, deserves a sauce that can truly complement its character. Its ridges and hollow center are perfect for capturing rich, chunky, and creamy sauces.
- Hearty Meat Sauces: A slow-simmered beef or pork ragù, Bolognese, or a spicy Italian sausage sauce are classic pairings. The meat clings to the pasta, and the rigatoni’s sturdiness stands up to the richness.
- Creamy Vegetable Sauces: Think creamy mushroom and truffle sauces, roasted red pepper and mascarpone, or a vibrant pesto cream. The hollows of the rigatoni become little pockets of flavor.
- Robust Tomato Sauces: A simple yet powerful arrabbiata, puttanesca, or a classic marinara with fresh basil will coat every surface of your homemade rigatoni, offering a delightful burst of acidity and freshness.
Frequently Asked Questions about Rigatoni Pasta Makers
What is the ideal dough for extruded rigatoni?
The ideal dough for extruded rigatoni is typically a firmer, low-hydration dough, often made with a blend of durum wheat semolina flour and ’00’ flour, with minimal water and sometimes eggs. It should have a crumbly, coarse texture, like wet sand, rather than a smooth, elastic one.
Can I make rigatoni with a manual roller machine?
While a manual roller machine can roll out sheets of pasta dough, it cannot directly extrude rigatoni. You would need to manually cut the rolled sheets into squares, then individually roll them around a dowel on a gnocchi board to create the tubular, ridged shape. This is a time-consuming but traditional method.
How do bronze dies improve rigatoni?
Bronze dies create a rougher, more porous surface on the pasta compared to plastic dies. This texture allows sauces to adhere much better to the rigatoni, enhancing the overall flavor and eating experience. It’s a hallmark of authentic Italian extruded pasta.
How important is drying fresh rigatoni?
Allowing fresh rigatoni to air dry for 1-2 hours before cooking is highly recommended. This slight drying helps the pasta maintain its shape during boiling, prevents sticking, and contributes to a more appealing, al dente texture.
Are rigatoni pasta makers hard to clean?
Extruder dies, especially those with intricate shapes, can be challenging to clean if dough dries in them. The best practice is often to let any residual dough dry completely, then brush it out, or to soak the dies immediately after use in warm water to soften the dough for easier removal. Many modern machines also have dishwasher-safe parts.
Conclusion
Embarking on the journey of making fresh rigatoni with a dedicated rigatoni pasta maker is a culinary adventure that promises rich rewards. From the tactile pleasure of dough transformation to the incredible taste of homemade pasta, it’s an experience that connects you deeply with Italian culinary traditions. Whether you choose an automatic electric extruder or a versatile stand mixer attachment, the ability to craft these magnificent, sauce-loving tubes in your own kitchen will undoubtedly elevate your cooking and bring a whole new dimension of flavor to your table. So go ahead, embrace the art of fresh pasta making, and get ready to impress your palate and your guests!